环境搭建
依赖
1 | <dependency> |
1 |
|
controller
1 |
|
service
1 |
|
mapper
1 |
|
只要在启动类上加一个@EnableCaching注解就可以,关于@Cacheable,@CachePut,@CacheEvict,@Caching等注解在上一篇(springboot-cache)中已经解释过了。
测试
此时会报一个异常,这是由于User类没有实现序列化。给User实现一个Serializable接口,再进行测试。
1 |
|
此时没有报错了,也成功加入缓存中了。但是查看一个redis,发现。

这是由于默认使用的是JdkSerializationRedisSerializer,我们可以自定义序列化方式
自定义序列化方式
1 |
|
配置完之后,再来测试一下,先将之前的缓存清除一下。结果如下

源码分析
springboot在启动的时候,会自动装配一些配置类,详情参考(”springboot启动配置原理”这篇文章),引入了redis依赖后,只要我们加上了@EnableCaching注解后,CacheAutoConfiguration就能成功注入到ioc容器中,RedisAutoConfiguration也能成功注入到容器中,不加的话就不会注入到容器中。
RedisAutoConfiguration
1 |
|
注入了RedisTemplate,就可以使用RedisTemplate来操作redis数据库。其中还有个RedisProperties类,其中有配置了很多redis相关的默认属性,所以一般就不需要我们在配置文件中写常用的一些属性了。
CacheAutoConfiguration
1 |
|
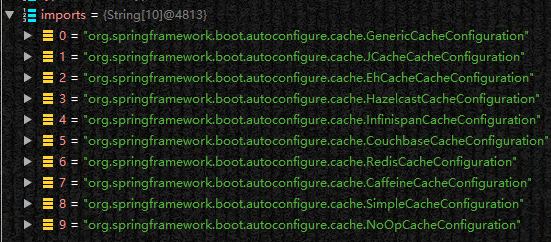
CacheConfigurationImportSelector
1 | static class CacheConfigurationImportSelector implements ImportSelector { |
这里会导入一些有关缓存的配置类
其中默认生效的是SimpleCacheConfiguration,详情参考(”spingboot-cache”这篇文章),但是我们加入了redis有关的依赖后,默认生效的就是RedisCacheConfiguration(这里自定义一个RedisConfig了之后,生效的有好几个,不知道为什么。。。)了。可以运行一下看看(在配置文件中加入debug: true)
RedisCacheConfiguration(org.springframework.boot.autoconfigure.cache)
1 | class RedisCacheConfiguration { |
这里会注入一个RedisCacheManager,这里会设置一个默认的配置:cacheDefaults(determineConfiguration(resourceLoader.getClassLoader()))
determineConfiguration是org.springframework.data.redis.cache.RedisCacheConfiguration类型的。
RedisCacheConfiguration(org.springframework.data.redis.cache)
1 | public class RedisCacheConfiguration { |
这里RedisCacheConfiguration主要配置缓存的序列化方式,时间等属性。
gitee:demo
github:demo