简介
RabbitMQ是一个由erlang开发的AMQP(Advanved Message Queue)的开源实现。
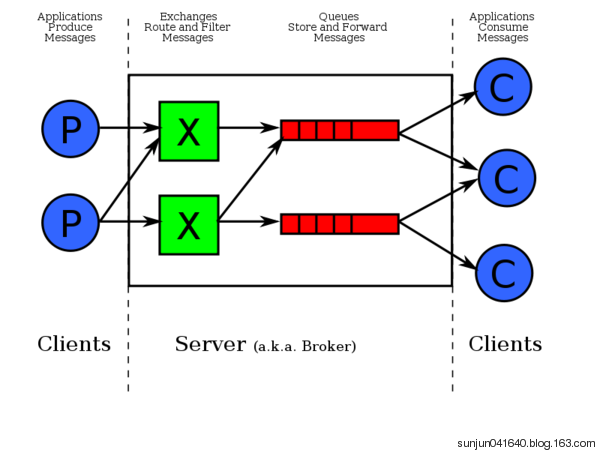
核心概念
- Producer&Consumer
- producer指的是消息生产者,consumer消息的消费者。
- Broker
- 它提供一种传输服务,它的角色就是维护一条从生产者到消费者的路线,保证数据能按照指定的方式进行传输,
- Queue
- 消息队列,提供了FIFO的处理机制,具有缓存消息的能力。rabbitmq中,队列消息可以设置为持久化,临时或者自动删除。
- 设置为持久化的队列,queue中的消息会在server本地硬盘存储一份,防止系统crash,数据丢失
- 设置为临时队列,queue中的数据在系统重启之后就会丢失
- 设置为自动删除的队列,当不存在用户连接到server,队列中的数据会被自动删除
- Exchange
- 消息交换机,它指定消息按什么规则,路由到哪个队列。
- Exchange有4种类型:direct(默认),fanout, topic, 和headers,不同类型的Exchange转发消息的策略有所区别:
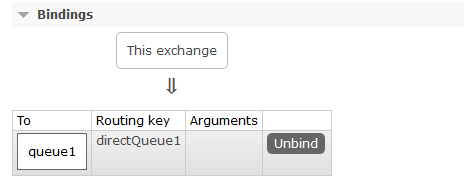
- Binding
- 将一个特定的Exchange 和一个特定的Queue 绑定起来。
- Exchange 和Queue的绑定可以是多对多的关系。
- virtual host(vhosts )
- 在rabbitmq server上可以创建多个虚拟的message broker,又叫做virtual hosts (vhosts)
- 每一个vhost本质上是一个mini-rabbitmq server,分别管理各自的exchange,和bindings–vhost相当于物理的server,可以为不同app提供边界隔离
- producer和consumer连接rabbit server需要指定一个vhost
环境搭建
引入依赖
1 | <dependency> |
自动配置原理
1 |
|
创建Exchange
1 |
|

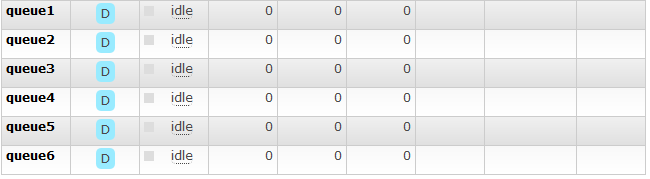
创建队列
1 |
|
创建依赖
1 |
|
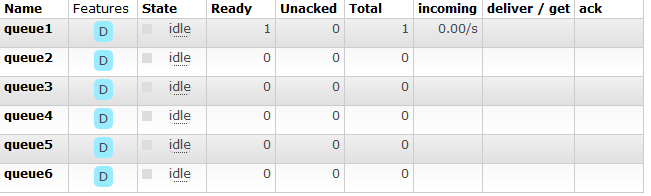
发送消息
DirectExchange(完全匹配)
1 |
|

可以发现这里的消息的序列化方式是默认使用java的序列化方式的。(查看RabbitTemplate类中有个MessageConverter属性,这是用来设置序列化方式的。默认是使用SimpleMessageConverter),如果想要自定义序列化方式。
1 |
|
FanoutExchange(广播)
1 |
|
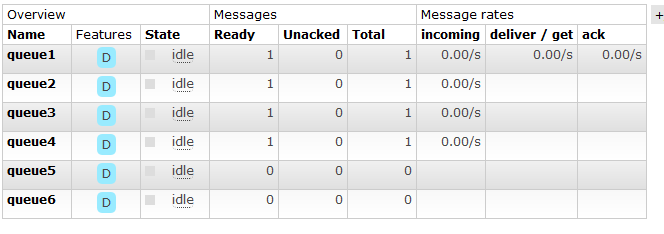
可以发现,与FanoutExchange绑定的Queue都收到了消息
TopicExchange(“#”匹配一个或多个词,符号“*”匹配不多不少一个词)
1 |
|
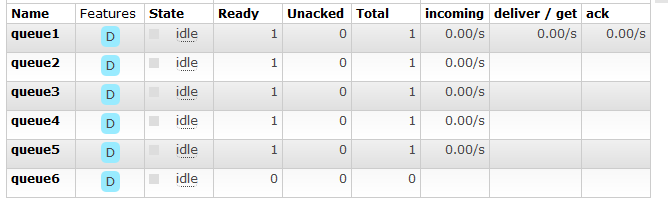
可以发现,topic.queue被topic.*匹配到,故queue5会收到消息。
接收消息
1 |
|
1 | {msg=send a message} |
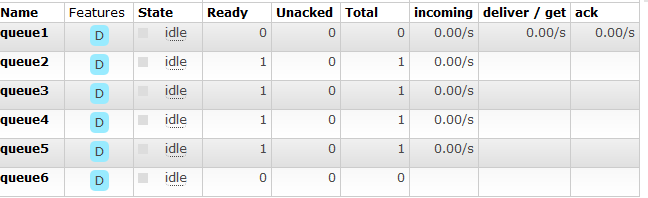
获得消息之后,队列中的消息就会被消费(删除)
使用@RabbitListener接收消息(需要加上@EnableRabbit)
1 |
|
这样receive方法就会监听queue1和queue2两个队列,一旦有消息进入这两个队列中,就会被receive方法消费掉。